Restaurant Food Photography Tips Using Your Smartphone
You don't need a pro photographer. These restaurant food photography tips will help you shoot scroll-stopping images with your smartphone — free.
Restaurant Food Photography Tips Using Your Smartphone
Professional food photography costs $500–$2,000+ per shoot. For an independent restaurant owner posting on Instagram three times a week, that math doesn't work. These restaurant food photography tips will help you create scroll-stopping images with your smartphone — no photographer required.
The difference between a great food photo and a mediocre one is almost never the camera. It's lighting, composition, and a few seconds of editing.
Why Lighting Is Everything
Restaurant lighting — that warm, moody incandescent glow — is the enemy of good food photography. It turns food orange, creates harsh shadows, and makes everything look slightly unappetizing.
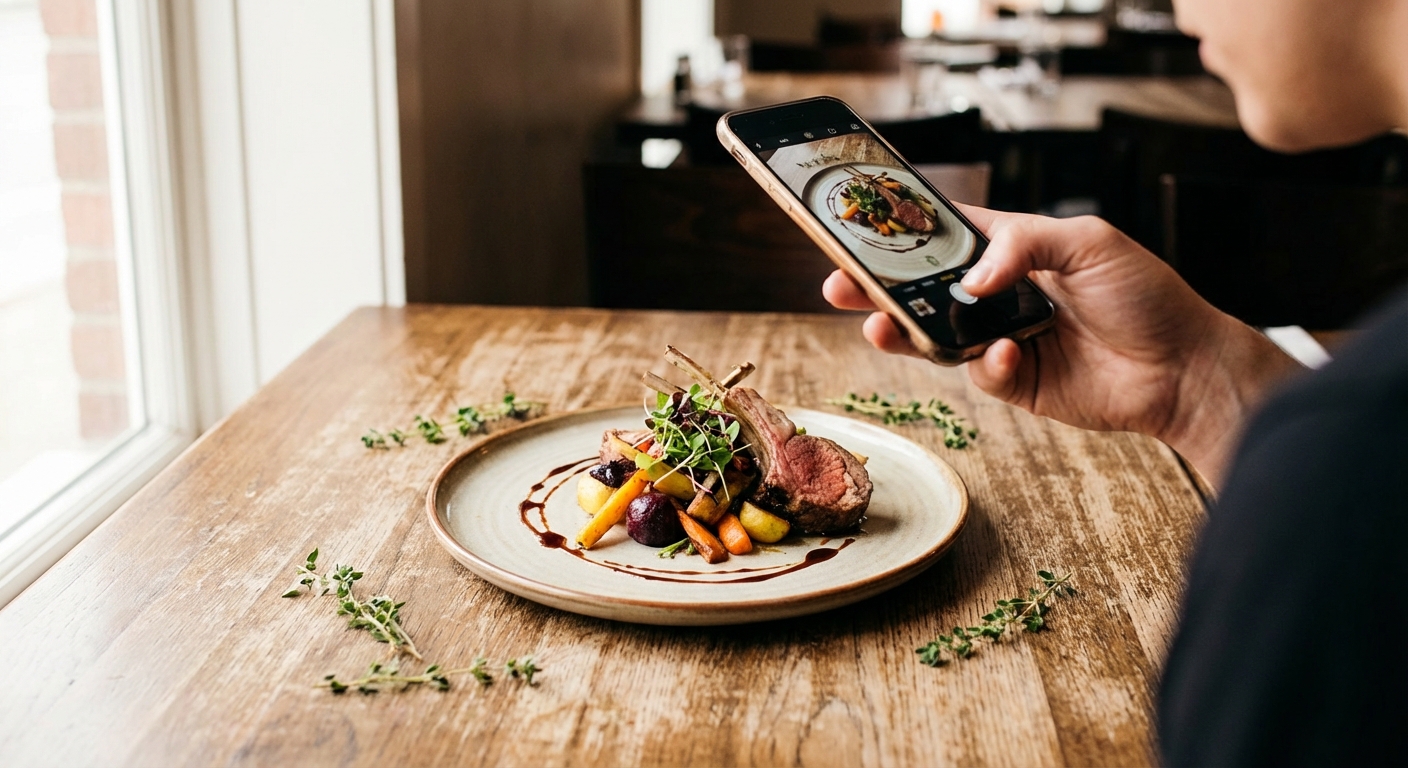
Use Natural Light Whenever Possible
If you have any control over when you shoot, do it during the day near a window:
- Soft, indirect natural light — not direct sunlight hitting the plate
- Side or back lighting — position the window to the side or slightly behind the dish
- Diffused light — tape white paper over the window to soften harsh sunlight
Shooting at Night or Without Windows
- Use a portable LED panel light ($30–$80) — rectangular panels are better than ring lights, which create circular reflections in shiny sauces
- Position the light to the side of the dish, not directly above
- Turn off overhead restaurant lights if you can — they compete and cause color mixing
- Never use your phone's flash — it creates flat, washed-out images every time
Composition: How to Frame the Shot
The Three Angles That Work
Overhead (flat lay): Shoot straight down. Best for bowls, flatbreads, grain bowls, and dishes with interesting patterns.
45-degree angle: A slight diagonal from above. The most versatile angle — works for almost everything.
Eye-level: Camera at dish height. Best for layered foods — burgers, sandwiches, cakes — where you want to see all the layers.
The Rule of Thirds
Turn on your phone's grid (3×3). Place the main element of the dish at one of the four grid intersections — not dead center. Off-center feels dynamic and intentional.
Props: Less Is More
Good props: linen napkins, wooden cutting boards, marble slabs, fresh herbs. Bad props: anything with visible branding, mismatched items, clutter. One or two props, thoughtfully placed.
Food Styling That Makes a Difference
Before you shoot:
- Wipe the rim of the plate clean — smudges are visible on camera
- Add fresh garnishes (herbs, oil drizzle, flaky salt) right before shooting — they wilt fast
- Use odd numbers: three scallops looks better than four
For sauces and soups, a light drizzle of olive oil catches light beautifully. Don't over-sauce — let the food's surface be visible.
Phone Camera Settings to Know
Lock focus and exposure: On iPhone, tap and hold on the subject until "AE/AF Lock" appears. On Android, tap to focus then look for a lock icon. This prevents refocusing as you shift position.
Portrait mode: Great for hero shots, but AI blur can look fake on complex food edges. Test it in good lighting — it performs better with natural light.
Shoot in the highest resolution available: Use Pro or RAW mode when editing carefully.
The 5-Adjustment Editing Workflow
These adjustments work in Instagram's built-in editor, Snapseed, VSCO, or Lightroom Mobile (all free):
- Brightness: Brighten slightly — food looks better slightly overexposed than underexposed
- Contrast: Increase slightly to make colors pop
- Warmth: Pull slightly warm — food looks most appetizing with slightly warm tones
- Saturation/Vibrance: Increase gently — over-saturation looks artificial
- Sharpness: A small increase brings out texture (char on a steak, sesame seeds on a bun)
Keep a consistent editing style. Pick 1–2 presets and stick to them. A cohesive grid feels intentional; random editing looks like a photo dump.
Building a Content System That Works
Shoot in batches: Block 30 minutes once a week to photograph 5–8 dishes. More efficient than nightly shooting, and you'll have a content library to draw from.
Caption like you'd describe it to a guest: Add something beyond just the dish name — a story, a season, a supplier. Stories get saves and shares.
Shoot beyond the plate: Prep and kitchen shots, team plating a dish, ingredients arriving from the farm. These create authenticity that product shots alone don't.
Frequently Asked Questions
What's the best phone for restaurant food photography?
Any iPhone from the last 3 years or a current-generation Android flagship (Pixel, Galaxy S) will produce professional-quality food photos. Lighting and technique are your constraints, not the camera.
How do I make food look more appetizing in photos?
Focus on lighting first (natural, side-lit), ensure the plate rim is clean, use a garnish right before shooting, and brighten slightly in editing. Warm tones consistently make food look more appetizing than cool or blue-tinted shots.
Should I use a ring light for food photography?
Ring lights work, but rectangular LED panels produce better results for food. Ring lights create circular reflections in sauces, glasses, and shiny surfaces that look unnatural. A $40 panel light gives you more flattering, directional light.
How often should restaurants post food photos on Instagram?
3–5 times per week is a sustainable target. Batch-shooting once a week gives you a library to work from without requiring photography every service.
Ready to take control of your food costs? Try CostLab free for 14 days →
Track Food Cost on Every Dish — Automatically
CostLab.AI calculates food cost percentage in real time. Update one ingredient price and see the impact across your entire menu instantly.
Start Free Trial →